Image Classification with Transfer Learning: Classifying Dog Breeds Using Python

Imagine having an AI that instantly tells you the breed of any dog you encounter! In this tutorial, we'll use Transfer Learning to build a powerful image classifier capable of recognizing dog breeds from photos, even with limited training data.
What is Transfer Learning?
Transfer Learning allows you to leverage pre-trained neural networks (trained on millions of images) and adapt them for your specific task, significantly reducing the time and data needed to train your model.
Let's Get Started!
Step 1: Setup Your Environment
Ensure you have TensorFlow and Keras installed:
pip install tensorflow matplotlibStep 2: Prepare Your Dataset
We'll use the popular Stanford Dogs Dataset. It contains thousands of images across 120 dog breeds.
Organize your dataset:
data/
  train/
    breed1/
    breed2/
    ...
  validation/
    breed1/
    breed2/
    ...
for this we need to execute the next command:
!wget http://vision.stanford.edu/aditya86/ImageNetDogs/images.tar
After the package is downloaded:
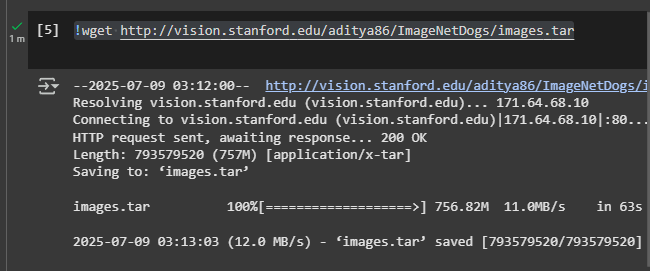
We should see a 100% with no errors We then execute the next portion of code:
!kaggle datasets download -d jessicali9530/stanford-dogs-dataset!tar -xvf images.tar!tree -L 2 | head
This will extract all the images from the package:

Create train / validation / test splitsThe raw archive groups images by breed only. Use the helper script below to move 80 % of each breed into train, 10 % into validation, and 10 % into test:
import os, random, shutil, pathlib
random.seed(42)SRC_DIR = pathlib.Path('Images') # source from the extraction stepDEST_DIR = pathlib.Path('data') # target root folderSPLITS = {'train':0.8, 'validation':0.1, 'test':0.1}
for breed_dir in SRC_DIR.iterdir(): imgs = list(breed_dir.glob('*.jpg')) random.shuffle(imgs) n_total = len(imgs) n_train = int(SPLITS['train'] * n_total) n_val = int(SPLITS['validation'] * n_total)
for img in imgs[:n_train]: dest = DEST_DIR/'train'/breed_dir.name dest.mkdir(parents=True, exist_ok=True) shutil.copy(img, dest) for img in imgs[n_train:n_train+n_val]: dest = DEST_DIR/'validation'/breed_dir.name dest.mkdir(parents=True, exist_ok=True) shutil.copy(img, dest) for img in imgs[n_train+n_val:]: dest = DEST_DIR/'test'/breed_dir.name dest.mkdir(parents=True, exist_ok=True) shutil.copy(img, dest)
!kaggle datasets download -d jessicali9530/stanford-dogs-dataset
!tar -xvf images.tar
!tree -L 2 | head
Create train / validation / test splits
The raw archive groups images by breed only. Use the helper script below to move 80 % of each breed into
train, 10 % into validation, and 10 % into test:import os, random, shutil, pathlib
random.seed(42)
SRC_DIR = pathlib.Path('Images') # source from the extraction step
DEST_DIR = pathlib.Path('data') # target root folder
SPLITS = {'train':0.8, 'validation':0.1, 'test':0.1}
for breed_dir in SRC_DIR.iterdir():
imgs = list(breed_dir.glob('*.jpg'))
random.shuffle(imgs)
n_total = len(imgs)
n_train = int(SPLITS['train'] * n_total)
n_val = int(SPLITS['validation'] * n_total)
for img in imgs[:n_train]:
dest = DEST_DIR/'train'/breed_dir.name
dest.mkdir(parents=True, exist_ok=True)
shutil.copy(img, dest)
for img in imgs[n_train:n_train+n_val]:
dest = DEST_DIR/'validation'/breed_dir.name
dest.mkdir(parents=True, exist_ok=True)
shutil.copy(img, dest)
for img in imgs[n_train+n_val:]:
dest = DEST_DIR/'test'/breed_dir.name
dest.mkdir(parents=True, exist_ok=True)
shutil.copy(img, dest)
*Tip 💡 * Keep each breed’s folder name exactly as its label – ImageDataGenerator.flow_from_directory will automatically map them.
Verify class balance (optional)
from collections import Counter
import os
cnt = Counter(
path.split(os.sep)[-2]
for path, _, files in os.walk('data/train')
for _ in files
)
print(cnt.most_common(5)) # sanity‑check
If any breed has far fewer samples, consider augmenting those images (flip, rotate, color‑jitter) to avoid class‑imbalance issues.
After this step your folder tree should resemble:
data/
  train/          # ~16 k images
    beagle/
    chihuahua/
    ...
  validation/     # ~2 k images
    beagle/
    ...
  test/           # ~2 k images
    beagle/
    ...
Feel free to tweak the ratios or drop the test split if you prefer relying solely on validation.
from tensorflow.keras.preprocessing.image import ImageDataGenerator

train_datagen = ImageDataGenerator(rescale=1./255, horizontal_flip=True)
validation_datagen = ImageDataGenerator(rescale=1./255)

train_generator = train_datagen.flow_from_directory(
    'data/train',
    target_size=(224, 224),
    batch_size=32,
    class_mode='categorical')

validation_generator = validation_datagen.flow_from_directory(
    'data/validation',
    target_size=(224, 224),
    batch_size=32,
    class_mode='categorical')
from tensorflow.keras.preprocessing.image import ImageDataGenerator
train_datagen = ImageDataGenerator(rescale=1./255, horizontal_flip=True)
validation_datagen = ImageDataGenerator(rescale=1./255)
train_generator = train_datagen.flow_from_directory(
'data/train',
target_size=(224, 224),
batch_size=32,
class_mode='categorical')
validation_generator = validation_datagen.flow_from_directory(
'data/validation',
target_size=(224, 224),
batch_size=32,
class_mode='categorical')
Step 4: Build Your Model Using Transfer Learning
We'll use the popular MobileNetV2
MobileNetV2 Keras
model pre-trained on ImageNet:
from tensorflow.keras.applications import MobileNetV2
from tensorflow.keras.layers import Dense, GlobalAveragePooling2D
from tensorflow.keras.models import Model

base_model = MobileNetV2(weights='imagenet', include_top=False, input_shape=(224, 224, 3))

x = base_model.output
x = GlobalAveragePooling2D()(x)
x = Dense(128, activation='relu')(x)
predictions = Dense(train_generator.num_classes, activation='softmax')(x)

model = Model(inputs=base_model.input, outputs=predictions)

# Freeze base model layers
for layer in base_model.layers:
    layer.trainable = False

model.compile(optimizer='adam', loss='categorical_crossentropy', metrics=['accuracy'])
Step 5: Train Your Model
This step will take a while because we are actually training our model with our organized dataset.
history = model.fit(
    train_generator,
    epochs=10,
    validation_data=validation_generator)
history = model.fit(
train_generator,
epochs=10,
validation_data=validation_generator)After the training step, you should see some results per epoch like the next image:

Step 6: Evaluate and Visualize Results
Plot training accuracy and loss:
import matplotlib.pyplot as plt

plt.plot(history.history['accuracy'], label='Accuracy')
plt.plot(history.history['val_accuracy'], label='Validation Accuracy')
plt.legend()
plt.title('Model Accuracy')
plt.show()
Step 7: Test Your Model with New Images
Load a new image to predict:
Now it's time to upload our own image and see how our trained model behaves with an image that it hasn't seen before!
import numpy as np
from tensorflow.keras.preprocessing import image

img = image.load_img('test_dog.jpg', target_size=(224, 224))
x = image.img_to_array(img) / 255.0
x = np.expand_dims(x, axis=0)

preds = model.predict(x)
predicted_class = train_generator.class_indices
predicted_label = list(predicted_class.keys())[np.argmax(preds)]

print(f'The predicted dog breed is: {predicted_label}')
We provide an image of a Terrier Dog.

The model predicts: The predicted dog breed is n02093428-American_Staffordshire_terrier, which is very close to the actual breed of the dog.
Conclusion
Transfer Learning empowers you to build sophisticated image classifiers with limited resources. Try it yourself, experiment with different breeds or even different types of images!
Happy coding! 🐶🐾
You can check a full copy of the notebook here: https://gist.github.com/Ainevoltas/6f93e4bd35ce90fbea6d9aa0ac41ca38
Happy coding! 🐶🐾
You can check a full copy of the notebook here: https://gist.github.com/Ainevoltas/6f93e4bd35ce90fbea6d9aa0ac41ca38
Comentarios
Publicar un comentario